Account
Registration
- To register on the site, enter your name and email address
- Then confirm your account
- You will receive an email with the confirmation link which you’ll need to click
Applying for a Student Account
- Once your email is verified, you will be able to choose the account type.
- Choose “Student” .
- Fill in your name, your photo, your teacher’s Storyboard ID (which should be given to you by your teacher), date of birth and gender.
- Then click the button labeled “Click to Submit Your Application”.
- Your application will have been submitted. You will need to wait for your teacher to approve it.
- At this point your teacher will verify your email and photo and either approve or reject your account.
Your Teacher's Storyboard ID
- You will need this number when you register on our site.
- This is how you connect to your teacher.
- You will either receive an email invite from our site to register, this email will contain your teacher’s Storyboard ID (check your email’s SPAM folder in case the invitation got stuck there) or your teacher will personally invite you to register on our site.
- Either way, make sure you have your teacher’s Storyboard ID before registering. You can ask your teacher for their Storyboard ID if you don’t have it.
What if my application was rejected?
- If your application was rejected, you will need to apply again. You will receive the reason for rejection on your email.
Approved Student account
- When approved, you will receive an email notifying you that your account was approved. (you might want to check your email’s SPAM folder)
- You should log in on our site at this time.
Profile setup
- On your first login after you got approved for the Student account, you will be prompted to create your Public Name and upload your profile picture.
- Your Public Name is what’s displayed publicly on our site, for privacy reasons, DO NOT use your real full name here.
- Your Profile Picture will be visible only to your teacher and other teachers and associates working on the project you’re assigned to.
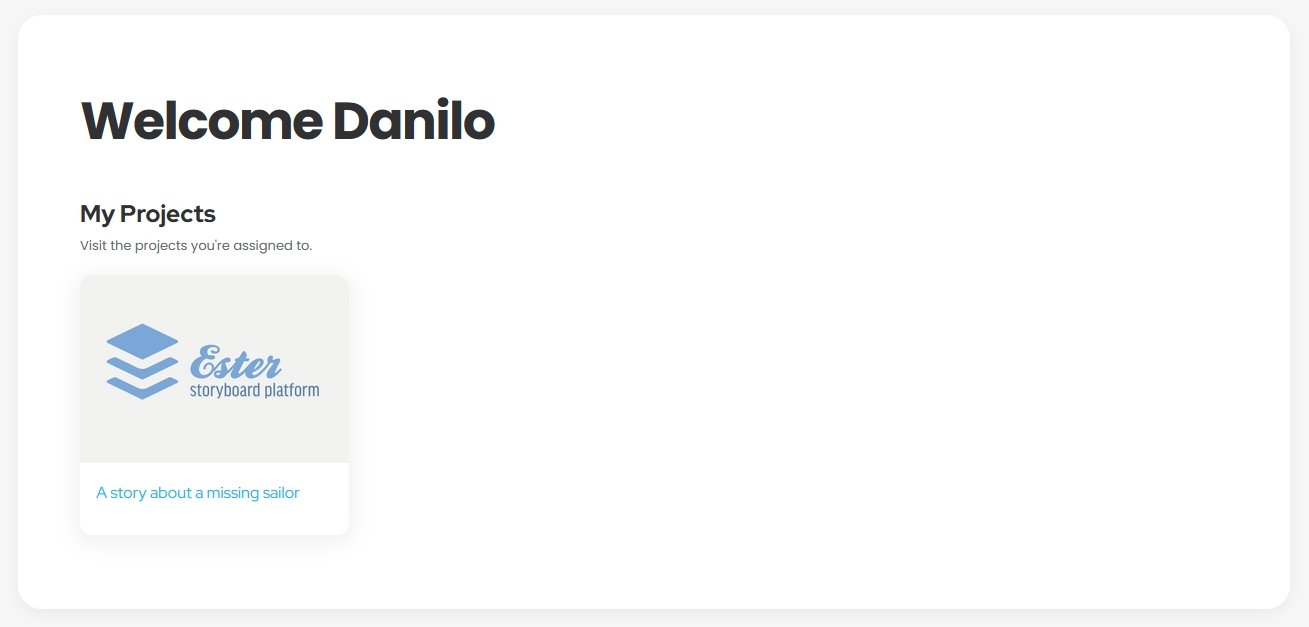
My Account
- My Account is where you can access the project(s) you were assigned to by your teacher.
Projects
- On “My Account” (after you log in) you will see the “My Projects” section.
- Click the project name that you wish to edit to start working on it.
- Follow your teacher’s instructions regarding editing the project.
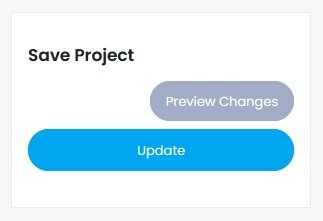
- Any changes you make will be applied by clicking Update in the “Save Project” menu.
- Your teacher(s) will see when you made the changes to the project.
Editing a project
Main project menu
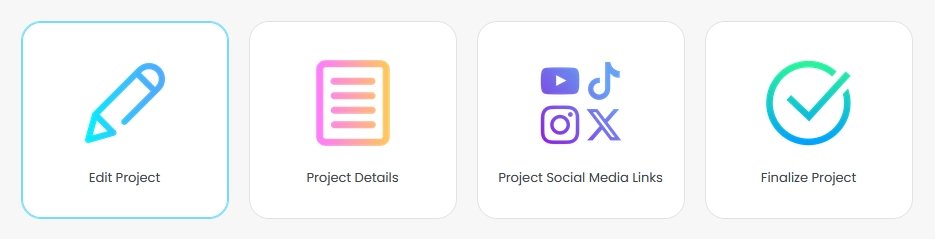
The main project menu has 4 sections:
- Edit project – Where you add the main content (Records) and write the project journal
- Project Details – Where you personalize the project with an image, description and tags
- Project Social Media Links – If a project is present online, here you can paste in the links
- Finalize the project – Insert links to Final Project Content. This refers to videos, podcasts, graphic novels… created after the project was finished.
Edit Project Section
This is the section you will spend the most time on. Here you add the actual records (documents) to your project and where you keep the project journal. It is important to follow your teacher’s instructions and edit the project as they instruct you.
- Only one person (student, teacher, associate) can edit the project at one time
- Make sure to listen to your teacher and organize as to who will edit the project and when
- If there are several students working on a project at the same time, only one should be editing the project, and the others should observe
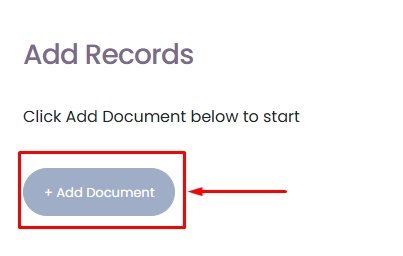
Adding Records
- Firstly, carefully read the “Records” instructions about the “Four Groups of Sources”
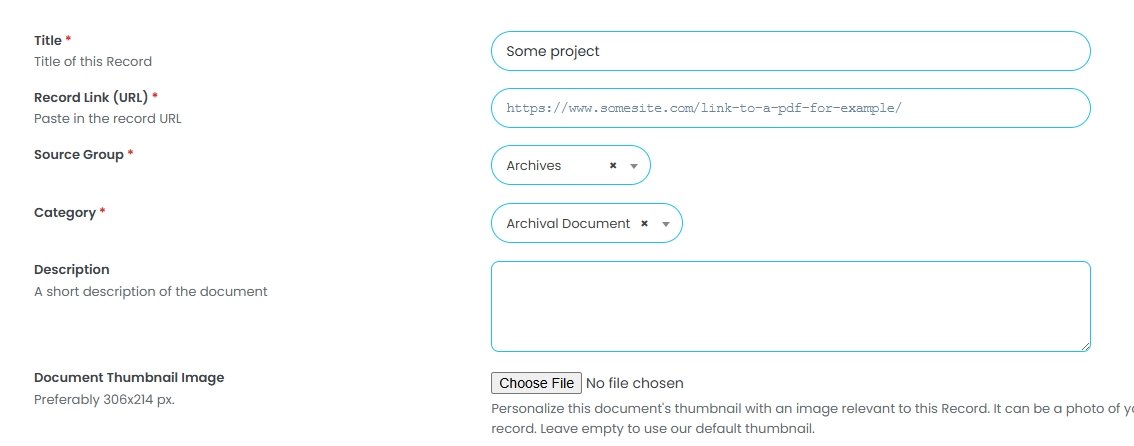
- To start adding records, click “+ Add Document”.
- Add a title to the document
- Add the link to the document
- Choose the Source Group, Category (and Subcategory if available)
- Enter a description
- Upload a document thumbnail image (optional)
- Click Update in the Save Project menu (top right)
- To add more records, repeat the steps starting with “+Add Document”.
Project Score
- The project score is tied to Adding Records.
- As you add more records, the project score will improve.
- Suggestions on how to improve the score will be available right under the project score bar.
- Detailed instructions about Adding Records are available inside every project, under “Records”

Project Journal
- As the project grows and evolves, you should keep a project journal, which is available as a text editor at the bottom of the Edit Project section.
- The project journal should contain the long description of the project as well as details about its creation and development.
- It is important to write about what you did, places you visited, people you talked to, organizations you visited and so on. The more details the better.
- There is also an image gallery available under the Project Journal where you can add images related to the project.
Project Details
Project details
- Here you can personalize and shortly describe your project
- Set the project cover image (optional). To do it, check the “Use a Project Cover Image?” checkbox and upload an image. If you don’t check the box, the header of your project page will be a simple background and text.
- Upload the project thumbnail image (optional). This is a small image that will distinguish your project in the projects library. If you don’t set it, our default image will be shown instead.
- Project Short Description – this is where you shortly describe your project, one sentence should do. It will be displayed under the project title on your project page. Save your longer description for the “Project Journal”.
- Project tags. A very important step which people find your project on our site. You should enter keywords and phrases separated by commas. You can use tags like your school name, names of teachers and associates involved, main subject of your project, what you researched, locations, places, sites and organizations you visited, people you’ve interviewed and so on. For privacy, do not enter student names.
Project Social Media links
- If the project is present on Social Media, you can add the links to relevant Social Media sites here. Click “+ Add Links” and simply paste in the URL. When you’re done, click Update/Publish in the “Save Project” menu (top right).
- To add more links, click “+ Add Links” for as many links as you need.
Finalize The Project
This is where you add the final project content.
Final Project Content
This is basically adding additional links to the project that are meant to be shown when the project is completed, so they are considered as “final content”.
- Initially, this content is hidden, and it can be published only when your teacher decides that the project is completed.
The types of Final Project Content i.e. what links should be used in this section:
- Video link (multiple videos allowed)
- For example the “after” video on YouTube, showing how your project was created.
- A guided city tour video that you created.
- A video with your interpretation of the “final video” for this project.
- Audio podcast link
- Graphic novel PDF link