Account

Registration
  • To register on the site, enter your name and email address
  • Then confirm your account, you will receive an email with the confirmation link which you’ll need to click
Applying for a Teacher account
  • Once your email is verified, you will be able to choose the account type.
  • Choose “Teacher” . NOTE: If you don’t have students of your own (and will never have, i.e. if you are an associate from a different vocation, working on a project) you should select “Associate”. You will have all the same privileges as a Teacher except the students management.
  • Fill-in your credentials (school/institution, address and a photo of your ID).
  • Then click the button labeled “Click to Submit Your Application”.
  • Your application will have been submitted. You will need to wait for approval.
  • At this point one of our staff will verify your identity and either approve or reject your account.
What if my application was rejected?
  • If your application was rejected, you will need to apply again. You will receive the reason for rejection on your email.
Approved Teacher account
  • When approved, you will receive an email notifying you that your account was approved. (you might want to check your email’s SPAM folder)
Profile setup
  • On your first login after you got approved for the Teacher account, you will be prompted to create your Public Name and upload your profile picture.
  • Your Public Name is what’s displayed publicly on the site, especially useful for students (for privacy reasons). Your real name will only be visible between you, your students and any associates you share a project with.
  • Your Profile Picture will also be visible internally, between yourself, your students and your associates.
Storyboard ID
  • After setting up your profile, you will receive your Storyboard ID. It is a unique ID number on our site which your students can use to link to you.
  • You should give your Storyboard ID to all your students as soon as you get it because the students will need it to complete their account registrations.
My Account
  • My Account is the standard account page for you, where you can access both your students and your projects.
  • If you just registered, we highly recommend going to My Students and inviting your students to register on the site.

My Students

Student Invitations
  • The first thing you’ll want to do is send the invitations.
  • We’ve made this easy, all you need to do is to type in the email addresses of your students, separated by commas, and click “Send Invitation Emails”.
  • Your students will receive the invitation emails containing:
    • Your name
    • Your Storyboard ID
    • Link where they can register on the site
  • After you send the invitations it might take some time before your students actually register on the site.
  • We do recommend telling your students to check their emails including their SPAM folders, in case the invitation emails get stuck in there.
  • Finally, you will receive an email notification every time a student registers using your Storyboard ID.
My Students page overview
  • As your students register, you will be able to approve or reject their applications (to avoid misuse of your storyboard ID)
  • New applicants will be listed under “New Student Applications”
  • Approved students will be listed under “Your Approved Students”
Managing new student applications
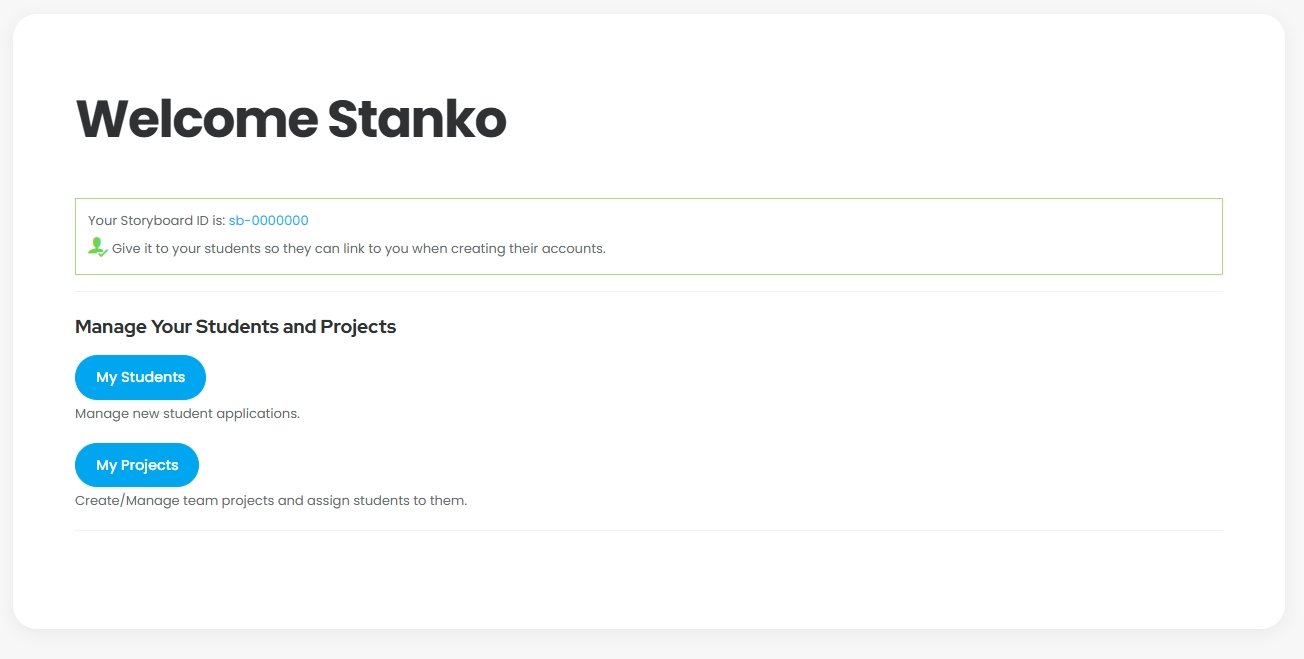
  • From “My Account”, go to “My Students”
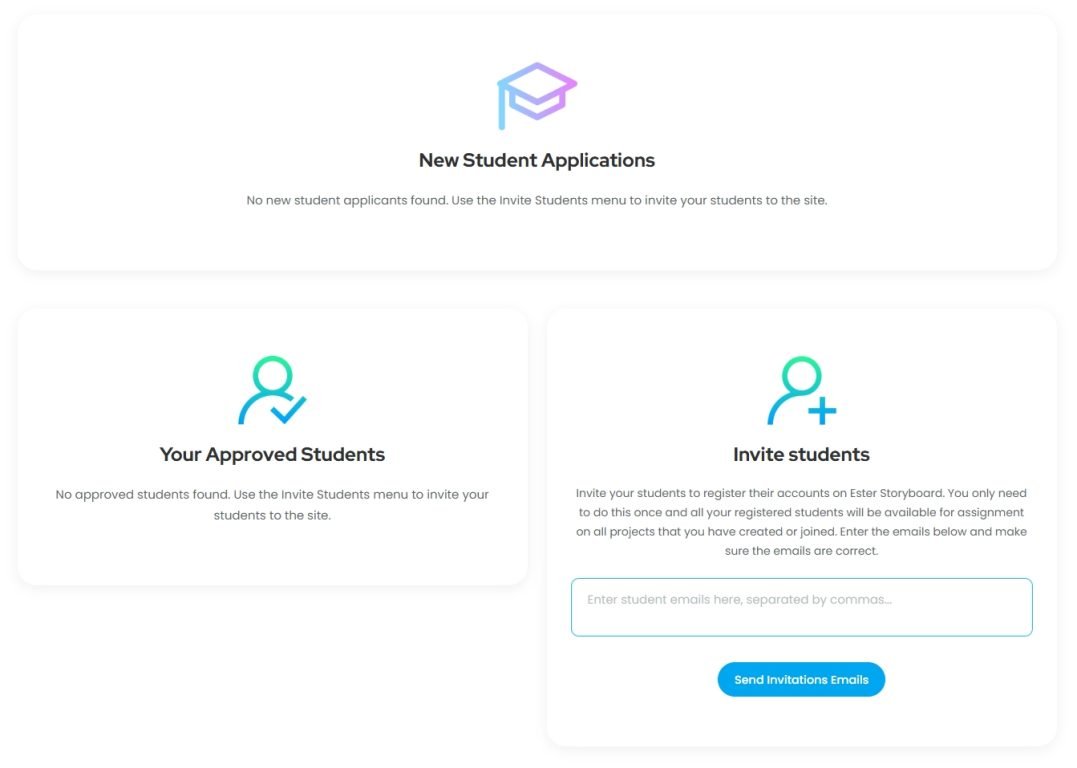
  • The first section, “New Student Applications” will list any new student applications you have.
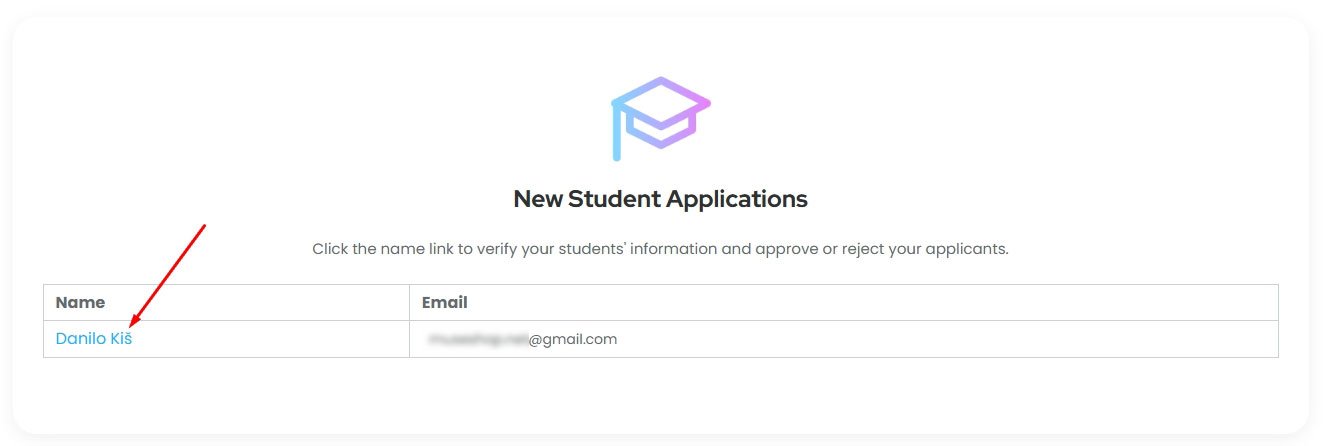
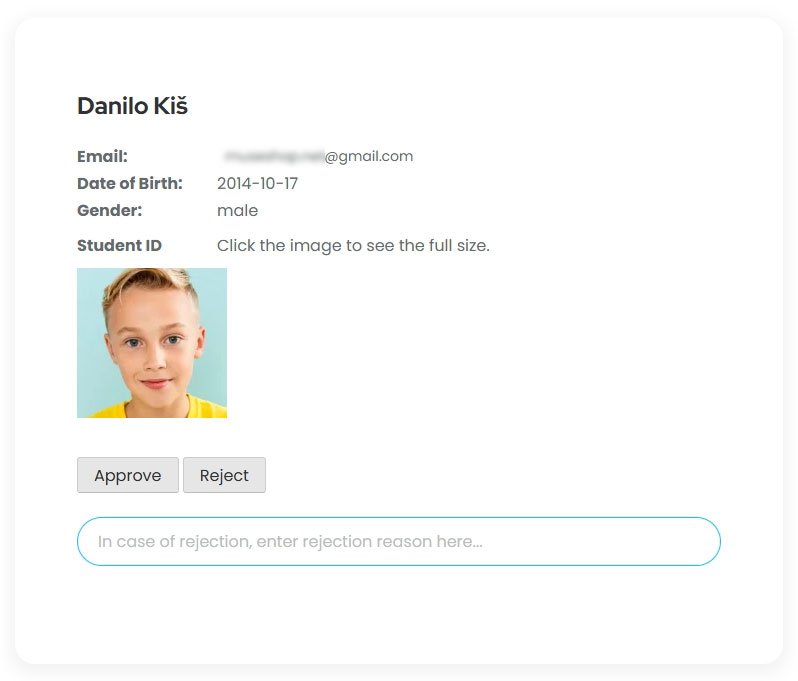
  • You can click a student’s name in that list and it will open details about that student
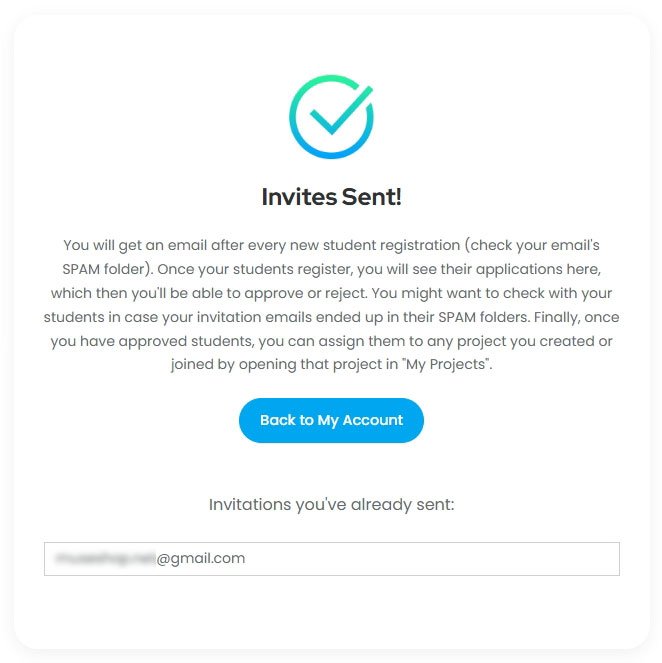
  • Select either Approve or Reject. In case you reject a student there is a “Rejection Reason” field where you can tell them why they were rejected
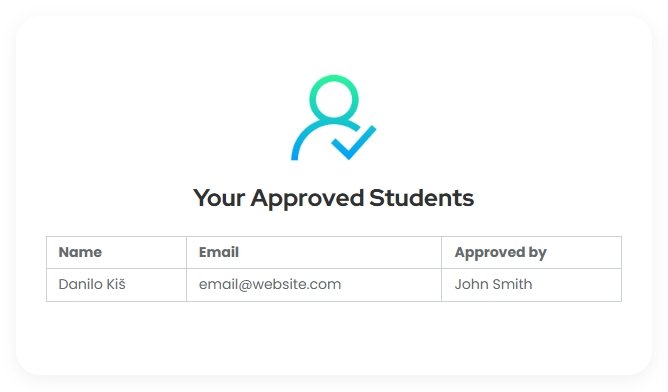
  • After you approve your students, you will be able to assign them to any project you want (this is done inside the project itself). For every project you will have the “Assign Students” menu, so you can assign some students to project A and other students to project B and so on.

Projects

Creating a project

Only Teacher and Associate account holders can create projects. Students can not create new projects, they can only edit the project you assign them to.

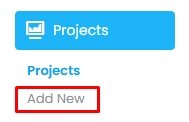
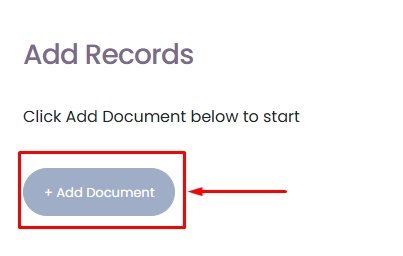
  • From “My Account”, go to “My Projects”
  • One left-side menu, under “Projects”, click “Add New”
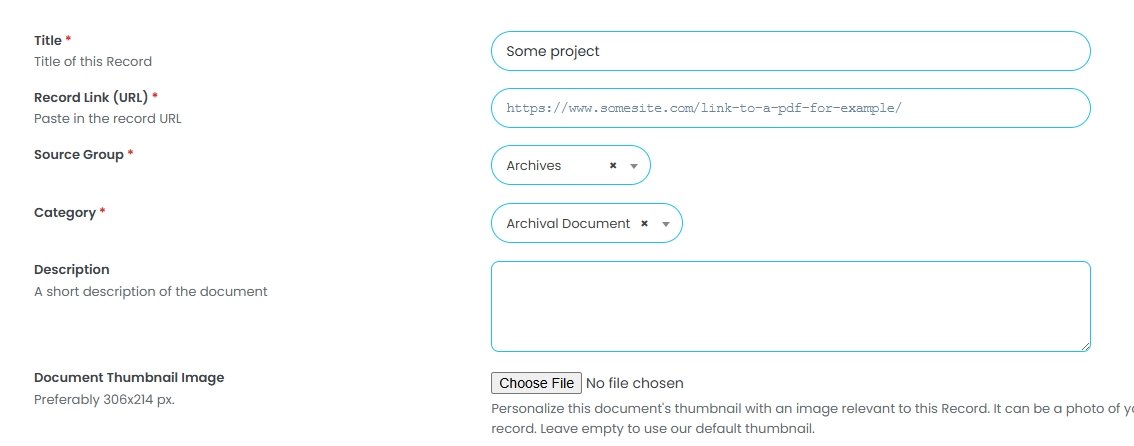
  • Give your project a name
  • Click Publish (on the top-right-side, under “Save Project” menu)

  • Any changes you make will be applied by clicking Publish (or Update, if the project is already published) in the “Save Project” menu.
If you got invited to join a project
  • In case another Teacher or Associate invited you to an existing project
  • You will receive an email invitation.
  • Go to “My Account” (or Log In)
  • you will see the invitation on the “My Account” page.
  • Accept the invitation
  • Go to “My Projects”
  • The project will be available in the projects list
  • Click “Edit” to start working on the project
  • TIP: If someone else is already working on the project, you will be able to take over or go back to my account. (only one person can edit a project at a time so that the changes made do not overwrite other participants’ work)

Editing a project

Main project menu

The main project menu has 6 sections:

  1.  Edit project – Where you add the main content (Records) and write the project journal
  2. Invite Colleagues – Used to invite Teachers and Associates to a project
  3. Assign Students – Used to assign students to the project
  4. Project Details – Where you personalize the project with an image, description and tags
  5. Project Social Media Links – If a project is present online, here you can paste in the links
  6. Finalize the project
    1.  Insert links to Final Project Content. This refers to videos, podcasts, graphic novels… created after the project was finished.
    2. Mark the project as Finished (which makes the Final Project Content publicly visible)

Invite Colleagues

Only Teacher and Associate account holders can invite other Teacher and Associate users to a project. Students can not invite anyone to a project.

  • You can invite as many of the colleagues as you’d like
  • Open the Invite Colleagues Menu
  • Click “+ Add More Project Collaborators” button
  • Enter your colleague’s email (Teacher or an associate, not a student)
  • Click Update/Publish in the Save Project Menu
  • Done!
  • After saving, an email invitation will be sent to the email(s) you specified. You don’t have to do anything else.
  • If the person you sent an invitation to is registered on the site, they will be able to join as soon as they accept the invitation.
  • If the invited person was not registered on the site, they will receive an email invitation and a link to register, once they do and once they accept the invitation, they will also be able to join.

Assign Students

Only Teachers can invite students to a project. Students can not invite anyone to a project. If more than one teacher has joined the project, all Teachers who joined can see (and assign) all the students available, your own as well as your Teacher colleagues’ students.

NOTE: Only once the project is published can the students be assigned. Before this point, the Assign Students menu will be empty.

  • All your approved students will be available on any project you create or join.
  • Check the checkbox next to any student you want to assign to this project.
  • NOTE: This menu can be changed/updated at any time, meaning you can add/remove students at any given time. For example, if not all of your students have registered on the site, you can start working with the ones that did and add the latecomers at a later time.
  • If you don’t have any students it’s a good time to invite your students now.
  • Aside from your own students, if another teacher is a part of the same project, the Assign Students menu will display their students as well.
  • All of the grownups (Teachers and Associates) can see all the students available for assignment. What designates which student belongs to which teachers is the teacher name in the parenthesis after every student name.

Edit Project Section

Although majority of the work here will be done by the students, it’s good to know how exactly this part of the project creation works.

Adding Records
  • Firstly, carefully read the “Records” instructions about the “Four Groups of Sources”
  • To start adding records, click “+ Add Document”.
  • Add a title to the document
  • Add the link to the document
  • Choose the Source Group, Category (and Subcategory if available)
  • Enter a description
  • Upload a document thumbnail image (optional)
  • Click Update in the Save Project menu (top right, if the project is not published, click Publish instead of Update)
  • To add more records, repeat the steps starting with “+Add Document”.
Project Score
  • The project score is tied to Adding Records.
  • As you add more records, the project score will improve.
  • Suggestions on how to improve the score will be available right under the project score bar.
  • Detailed instructions about Adding Records are available inside every project, under “Records”
Project Journal
  • As the project grows and evolves, you can keep a project journal, which is available as a text editor at the bottom of the Edit Project section.
  • There is also an image gallery available under the Project Journal where your students can add images related to the project.

Project Details

Project details
  • Here you can personalize and shortly describe your project
  • Set the project cover image (optional). To do it, check the “Use a Project Cover Image?” checkbox and upload an image. If you don’t check the box, the header of your project page will be a simple background and text.
  • Upload the project thumbnail image (optional). This is a small image that will distinguish your project in the projects library. If you don’t set it, our default image will be shown instead.
  • Project Short Description – this is where you shortly describe your project, one sentence should do. It will be displayed under the project title on your project page. Save your longer description for the “Project Journal”.
  • Project tags. A very important step which people find your project on our site. You should enter keywords and phrases separated by commas. You can use tags like your school name, names of teachers and associates involved, main subject of your project, what you researched, locations, places, sites and organizations you visited, people you’ve interviewed and so on. For privacy, do not enter student names.
Project Credentials and Acknowledgements
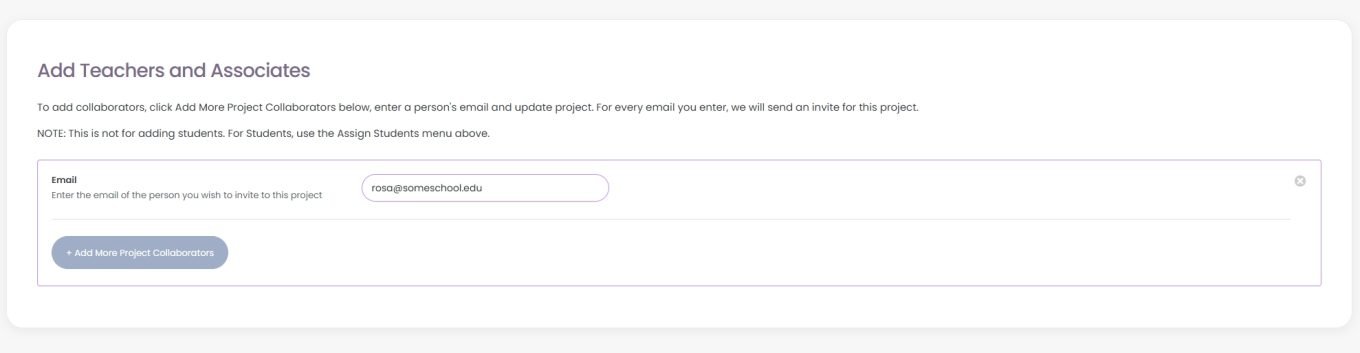
  • This will be displayed in “The Project Team” section on your project page.
  • Here you should enter:
    • Names and titles of the teachers and associates that were involved in the project.
    • Institutions they belong to.
    • You can link the institution names to their official websites by selecting the text and adding a hyperlink using the text editor toolbar/menu.
  • For privacy, you should not put student names here, unless all the legal requirements are met.

Project Social Media links

  • If the project is present on Social Media, you can add the links to relevant Social Media sites here. Click “+ Add Links” and simply paste in the URL. When you’re done, click Update/Publish in the “Save Project” menu (top right).
  • To add more links, click “+ Add Links” for as many links as you need.

Finalize The Project

There are two steps involved in finalizing the project

  1.  Adding Final Project Content.
  2. Mark the project as Finished
Final Project Content

This is basically adding additional links to the project that are meant to be shown when the project is completed, so they are considered as “final content”.

  • Initially, this content is hidden.

The types of Final Project Content i.e. what links should be used in this section:

  • Video link (multiple videos allowed)
    • For example the “after” video on YouTube, showing how your project was created.
    • A guided city tour video that you created.
    • A video with your interpretation of the “final video” for this project.
  • Audio podcast link
  • Graphic novel PDF link
Marking the project as Finished

The last step. Visible only to teachers. Students can not mark the project as finished.

  • When you have filled out all other content.
  • Click “Finalize Project”
  • Under “Finalize the Project” dropdown, select “Yes”
  • Update/Publish the project in the “Save Project” menu (top right)
  • Done!

This will make public the links from “Final Project Content” and you can consider your project finished, bravo!

Things to check before marking the project as finished
  • Your students should have added all the Records in the “Edit Project” section.
  • You should be satisfied with the current project score and grade.
  • The Project Journal and Project Journal Gallery should be filled, describing the process of creating the project and showing images related to the project.
  • Project details should be filled, including at least the Project Short Description and Project Tags.
  • Project Credentials and Acknowledgements should be filled (under Project Details)
  • Final Project Content should be filled (under Finalize Project)